Crabbok’s Legion AI System v1.1
This system is designed to give players a chance to play Legion at home. It’s obviously leaving some choices up to random effects, so the command abilities are designed to give the AI an advantage to make up for the lack of actual decisions and tactics. If you find it too easy, I suggest increasing the point limit of your enemy force by increments of 100, until it begins to challenge you. Stay home, stay safe, and keep gaming!
Download the New, Printer Friendly Deck, Updated thanks to Uchidan (Clever Clanker), HERE!
Download the Rules Reference Guide for V1.1 Here!
Setup
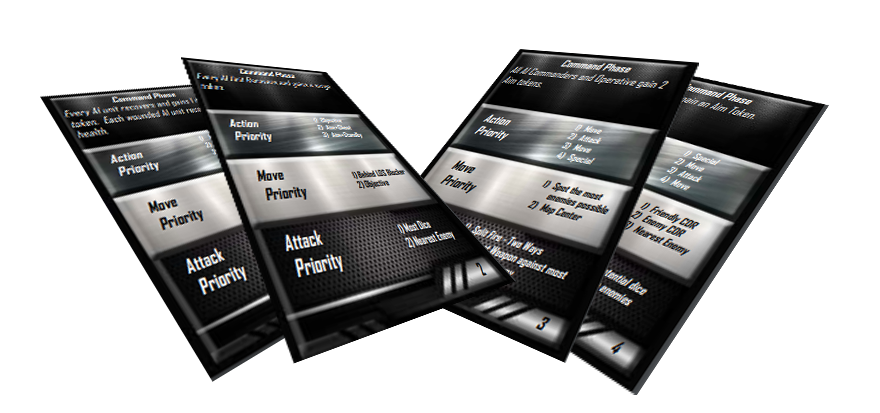
First gather the AI deck, and shuffle it! You’ll be using this deck alot when it’s time to make decisions! When preparing the game board, you’ll reveal a random Condition, Objective, and Deployment card and those will be the cards for the game. Then you’ll place any and all tokens for the objective and/or condition if applicable. You won’t know if you are blue or red player, so ensure that placement is equally fair for either side. Finally you will randomly determine if you are blue or red player via pulling a card from the AI Deck, if it is Odd, you are Red, if it is Even you are blue.
When deploying units – deploy ALL player controlled unit first – then deploy AI afterward. AI should be deployed in a way such as to give advantage to the AI. This means, closer to objectives if possible, and behind LOS blocking terrain, and/or heavy cover when possible. This part allows you to use your imagination a bit if possible. It is also important to keep build functions in mind when deploying the AI. For example, you will want to generally ensure that clones are moderately close together, such that token sharing can occur.
AI Tiebreaker
Any time there are multiple choices of a unit, the AI can break ties one of two ways. If the choice if in regards to an attack, simply go with which ever unit is closer to the attacker, if you can tell. In any other case, simply count out all available units from left to right, assigning them a number, (1, 2, 3, etc…) and then pull cards from the deck until you draw a card with a number that matches one of the available numbers. Choose that option. Example: I pull a corps token from the stack and have 5 Corps units – but only ONE of them have already activated. That leaves 4 available. From left to right, I’ll consider the far left “1”, the next “2”, the next “3” and the far right “4”. Then I’ll start flipping over random cards from the deck until I get a 1, 2, 3, or 4 and whichever I get first will be the unit I activate.
Command Phase
The AI will never play a command card, and instead will reveal one random AI card, and will gain whatever COMMAND bonus is on that card for the turn. (The card will then be returned to the deck) These bonuses are meant to replace the bonuses that a command card might give, and also help offset the lack of strategy that an AI player might have. The AI will ALWAYS pull a random order token from the stack. When there are multiples, use the AI Tiebreaker formula to randomly determine which unit to activate.
Once a unit has been activated, the AI player shuffles the deck, and reveals the top card. After the rally step, if the unit still has two actions available to it, (Not ionized, or suppressed, for example), then it will follow the card. Otherwise the unit will first try to move, and if it can not it will try to Attack. If it can do neither of those it will recover.
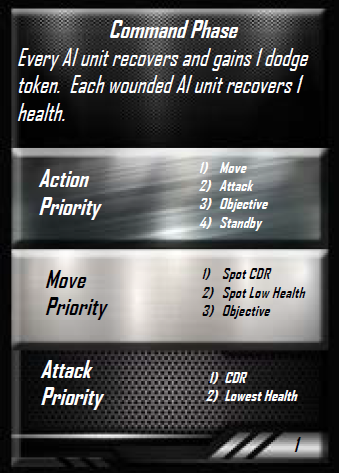
Following the Action Priority, a unit will attempt to perform actions, starting with the top and working their way down until TWO actions are completed.
Attack – The unit will attack. If it is in a melee, it will melee attack if possible. If it has ranged targets it will consult the attack priority to determine which enemy it will target. The AI generally will not split fire unless instructed to by a card. If there is a tie for attack priority, the winner will be whoever is closest if you are able to clearly determine which – if not then simply use the AI Tiebreaker method. The AI will always spend all available tokens during an attack as long as there is something to be gained from doing so. This means even a single blank die will cause the AI to spend an aim. This also means clone players will spend ALL available aims from nearby units as long as there are blank dice. Surge tokens will also be spent – so long as they make sense. (A unit that has surge to crit, will NOT spend a surge on attack, for example. Units will also be able to use special functions such as Lethal, by spending Aim tokens if there are any left AFTER all modifications are done. Here is the formula:
Attack ->Aims for rerolls ->Surges if necessary ->Any additional tokens if applicable.
Standby – If the AI has a Standby (Or has an available standby close enough for Clone Players), it will always spend it as soon as it can. The AI will always spend standby to attack the unit that triggered the standby if possible – if for some reason that unit cannot be targeted, (inconspicuous, incognito, etc) then simply attack the closest unit possible. If there are no units, the Standby will instead not get spent, unless the unit happens to have relentless, steady, or charge – in which case you may check to see if they could engage the unit via a move, and then perform the move + attack.
Aim + Attack – When you see Aim + Attack, you only take the Aim if you have enough actions to both Aim and Attack. If you have no targets – skip the Aim. If you only have one action left at that point, simply attack without an Aim.
Aim + Standby – When you see Aim + Standby, you only take the Aim if you have two actions available at that point. If you have only 1 action, skip the Aim and just standby.
Objective Action – An action to win the game based on the objective. It will be to manipulate a Moisture Vaporator, or claim a supply crate, or if there is no objective with a printed action, it will be to move towards an objective. In the case that the objective is to simply BE somewhere(Like a deployment zone), it will be to move in that direction the most direct route. If the objective is to attack something, it will be that.
Special – This applies to special printed actions on a unit card. It might be to Arm a mine, or to Pull the strings. When doing special actions – you can simply choose the best option in terms of “WHERE” to place a mine, or which unit to pull the strings on – but there will also be an appendix detailing more of an AI system for determining these at the end.
Movement
Moving the AI will always be done with “Movement Priority” printed on the card. Whenever possible, the AI will move to try to have the highest cover possible from the closest enemy unit. This might mean exposing the bulk of the unit to un-covered fire from a different angle at times. The AI will always use the full length of their movement tool’s distance, except when that full move would be illegal, (Such as landing on top of a barricade or other terrain piece). In this case, it is acceptable to slide the unit back just enough so that it is touching whatever stopped it.
The Movement Priority indicates the general direction the unit will try and move towards. If the most direct route is over terrain, then the AI will either perform a difficult move, or will clamber. The AI will never “Climb” unless directed to on a card. (Currently, no card directs the AI to climb).
Spot – This means that you will move such that you can get a shot on the target. If they are out of your range, you’ll move to put them in range if you can. If one move won’t be able to accomplish this, then skip this step. The same goes for an enemy that you do not have Line of Sight on. When moving to spot them, you will attempt to move the AI unit so it has the best shot if possible, to reduce cover.
Attack
AI Cards have an Attack Priority section with outlines the order in which enemy targets must be declared. In all cases, if there is ever a tie, for example if the priority is for an enemy commander, and there are two enemy commanders in range, then simply let the closest enemy be the tiebreaker. In the even they are the same distance, then use the AI Tiebreaker system above to randomize which target gets selected.
Appendix A) Special Action Guidance
Pulling the Strings – Determine which available unit could have the highest dice pool and also have a target – also consider movement based attacks like relentless. Select the unit that has the highest dice pool, that could actually make an attack.
Mines / Charges – Simply set these as close to your attack target as possible, and if they are in range of an enemy with their explosion – set them to hit the highest number of enemies possible, regardless of how many friendly units they would hit. Detonations should trigger immediately.
Appendix B) – If you cannot print out the full deck, you can also optionally roll a ten sided die, or D10, and reference the card number each time. To ease in this, I’ve made the whole deck easier to print on a single sheet, or simply to have available digitally. Download the full deck in easier to read format here: Crabbok’s Legion AI Deck – Full Spread
Appendix C) – Examples of play can be found below!
Rules Updates for Version 1.1
Droid AI – When playing against units that have AI command on their unit card, (Separatists) droids will be at a terrible disadvantage due to lack of being able to have face-up orders. When you pull a card to activate a unit, if the card has an EVEN number at the bottom right, you ignore the AI Keyword, allowing it to follow action priority normally.
Free Actions – AI Units will always use Free Actions as soon as they can, if they would provide any benefit. For example, a unit will take a free aim token, IF it’s going to be able to attack this activation (Even if it’s an exhaustible action) – otherwise it won’t take it.
Wheel Mode – Similar to Free Actions – units with speed enhancing abilities like “Wheel Mode” will determine weather or not to use them based on how far they are from enemy units. If they would not be able to shoot, even after a normal speed-1 move, then Droidekas WILL choose to change into Wheel Mode – even if that means they may end up too close and getting shot.
Displacement – AI movement priority may from time to time cause the AI to displace their own units. AI units will NOT suffer suppression from displacing friendly units, and will place the units back as close to their original position as possible.
Elastic Clause – Since this system is intended to be fun, yet may also lead to some bizarre choices for the AI, the player may elect to invoke the elastic clause. Up to THREE times per game, the player may intervene the AI system if it would do something that is obviously a terrible choice. This is NOT intended for the player to make things easier on him or herself, but rather to make a battle more dramatic and/or realistic – if so desired.
Card Clarification – On the printed cards, CDR is short for “Commander”. And Aim+Shoot should be the same as Aim + Attack – thus if you are in melee and are told to AIm + Shoot, you’ll still AIm and Melee Attack.
Thanks – Big thanks to Uchidan (Clever Clanker) on the Legion Discord for cleaning up and redesigning the cards and helping with the Rules Reference Guide as well!
OLD Files – If you wanted the older version (NOT Printer Friendly) you can find it here: : Original AI Deck