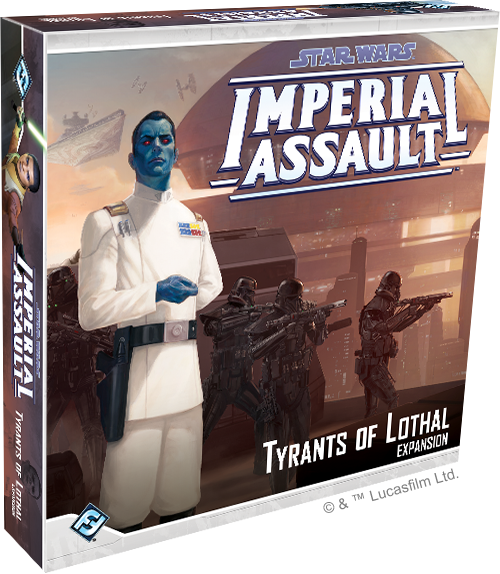
Imperial Assault just got a new announcement! It seems Thrawn, and the remaining heroes from Star Wars Rebels are making their way to Imperial Assault with this next expansion! This is great news for fans of Imperial Assault, especially those who feared the game was “”dead”, but this is also potentially good news for Legion players looking to spice up their game a bit.
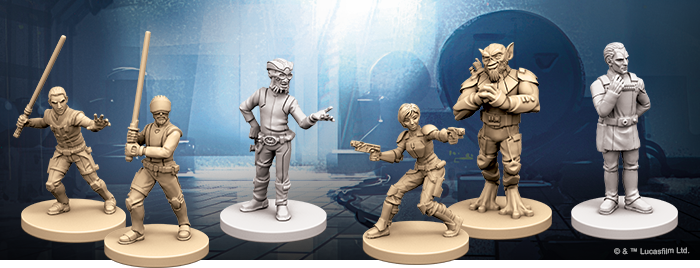
As with most other Imperial Assault expansions, this one comes with it’s own wave of blister boxes in addition to the Tyrants of Lothal small box. This wave is going to be loaded up with more principle character than almost any wave we’ve seen so far! We’ve already seen a glimpse into the possibility of them making a Rebels wave, since they released The Inquisitor, Ahsoka, Hera, and Chopper last year, but now we are going to fully complete the crew of the Ghost (or very close to it).
With the inclusion of virtually every main character from the show, it begs the question of whether of not FFG is simply trying to tie up loose ends, and wrap up this game permanently. The release of Legion, in a very similar scale has seemed to be a total replacement for Imperial Assault, allowing battles in a larger scale, with better miniatures, on better terrain. And the best part is that you don’t have to assemble a new map out of dozens of puzzle pieces every time!
Not everyone was included however. Some characters simply didn’t make the cut. Noteworthy absences include Ruhk, Governor Pryce, Kallus, Ryder Azadi, and the short time crew member, AP-5. If they do eventually keep Imperial Assault going, there are certainly more characters available that would fit naturally. Don’t forget about the increasing popularity of Dr. Aphra, and the fact that IA already has her two droid friends from the comics. There are still a few minor loose ends.
What does this mean for Legion?
Deathtroopers! For starters, if you’ve wanted Death Troopers in your game, but didn’t want to paint your stormtroopers black, well now you’ve got a proxy model that’s going to look the part and be ALMOST the same size. It’s long been speculated that Death Troopers will be coming to Legion at some point, and this might be the perfect mini to hold you over and practice your painting skills on, (because an all black trooper can be tricky sometimes!)
There’s also everyone else! If you’ve longed to use the entire Ghost crew on your tabletop, you now have your chance. Weather you want to paint them and proxy them all as a Rebel Trooper unit, or swap them out for unit leaders, you will soon have that option. You can use them as-is, or perhaps you’ll want to re-base them, but cutting them off at the feet and gluing them to Legion bases. Personally, I’d sign Zeb up to be my Z-6 Trooper, because I think he’d love that huge gun! The same goes for Thrawn – Using him in place of a Stormtrooper leader, or even swapping him out when using General Veers, it gives you some additional customization options for anyone who has been eager for Thrawn, Deathtroopers, and the crew of the Ghost!
Keep in mind however, making modifications like swapping minis in from other games, wouldn’t be legal in any Organized Play scenarios – so if you want to play in a tournament you’ll need to use the correct miniatures. But for other times, this could be a great way to spice up your game! Just be sure and make sure your opponent is OK with you proxying models.
With any major new FAQ and Errata there’s always bound to be a major shake up in the meta. Today I want to discuss the winners and loser of this change, and how the meta may change moving forward.
Losers:
Some changes were good overall, like the change to Strategic Adviser and Biggs. But ultimately, some things really got hurt. Lets talk about the biggest losers.
Relay
Relay got hit hard, but in a way that makes perfect sense. Now it simply extends range rather than making squadron range infinite. Most would agree that this makes great logical sense, but this does hurt those fleets that were designed to exploit the old way of keeping ships far away from the fight, and removing all risk of their carriers taking fire. The Lambda is probably hurt more than the VCX, considering it has twice the Relay value, but the entire strategy of using Relay now has to change to include some risk, keeping your fleet together, and keeping your carriers in the fight.
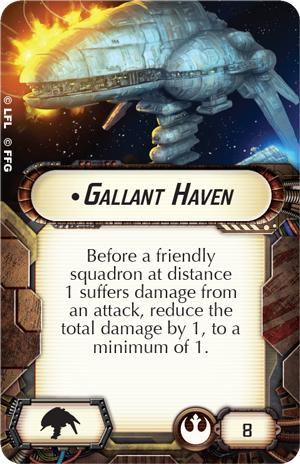
Gallant Haven
This one wasn’t as widely abused, but when it was used it had the potential to be significantly overpowered. The power came from unique squadrons with the brace token. Even if a friendly squadron was hit for two damage, they could just brace and reduce it to one, then having Gallant Haven reduce that one to zero. And if you had Jan Ors nearby, you didn’t even need to have your own brace token, since you could “borrow” hers. This title now will still help for larger attacks, such as three or more, but it will no longer stop the small damage from going through.
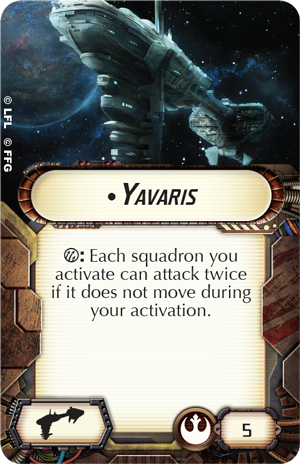
Yavaris
While Yavaris wasn’t changed too much, a very common crew combination certainly was. Using Flight Commander and Fighter Coordination Team together, would allow you to delay your squadron command until after moving, and also after you gave your squadrons a free speed-one move. It allowed you to partly ignore the restriction that came with this amazing ship. But that isn’t the only nerf to Yavaris. The relay nerf also hurts Yavaris more so than any other carrier, in that most Rebel Fleets that use Yavaris, often find that it’s the first target for the enemy fleet. No more, can Yavaris dish out squadron double-taps from the rear ranks and relative safety.
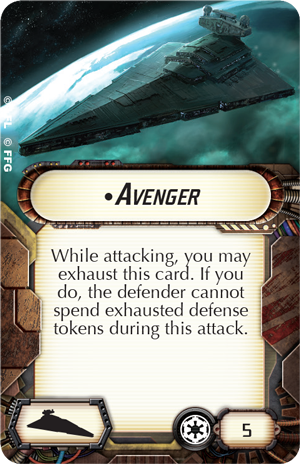
Avenger
While not the worst nerf, the Avenger’s new requirement to exhaust will actually affect it in multiple new shooting scenarios. The first case is the common use of boarding teams, where you have a double arc on the defender. An enemy flagship, at full strength, would seldom be able to survive. Another case is when using Gunnery Team, where you’d be shooting on multiple targets that may have spent some tokens already. But a third scenario is when using the Advanced Gunnery objective and you were actually able to attack from your front arc even against the same ship twice. At least in the case of this nerf you can still use it’s ability once, which still allows it to be used, and it will still probably be the most widely used Star Destroyer title. Probably.
The Third Flotilla in Your collection
This was the one that bothered me the most. Restricting flotillas to a hard cap of only 2 per fleet has a ton of implications. First off, everyone who bought 3 or more are now unable to use them unless it’s a strictly casual game. Second, those flotillas are now much less useful, in that they can no longer hang out around the edge of the board, supporting your squadrons, even while your ships are dead. But another implication is that future flotillas are now at a disadvantage. If FFG makes another flotilla in the future, you’ll have a hard time deciding on which 2 you want to use, considering the utility that GR-75s and Gozantis offer your fleet, it may force players into an uncomfortable decision.
Winners
When some things get worse, sometimes other things get better by proxy. Let’s take a look at the biggest winners that result from these changes.
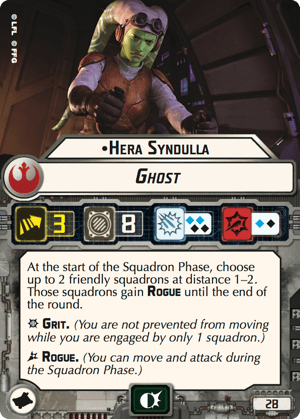
Hera
With all of the VCXs and Lambdas getting nerfed, Hera remains the one that was untouched, keeping her original balance and power level. Her ability still is able to ignore distance from ships, and she now has more of a unique ability when you consider that her counterparts with the nerfed relay are restricted to staying close to the fleet. All rouges, actually, are winners here, but Hera is by far the biggest winner from the group, being able to still provide that autonomous activation to squadrons who lack rogue.
Boosted Comms
Boosted Comms started to see less and less play once relay came out. It almost became irrelevant. Now it is back and better than ever. Considering it stacks, in a meaningful way, with relay now, you can layer these two extensions together and still get some distance between you and your squadrons if you really want to. I expect to see more of this card in the future, especially on Quasars.
Centicore
Another upgrade that may see more play as a result of the relay nerf. Centicore never saw alot of play, and one main reason for that was that relay was just so much better. Now it can potentially help fill some gaps left by the nerf, giving squadron based fleet greater flexibility in activations. And since fleets will likely be flying closer together now, you are more likely able to take advantage of this one.
Other Boarding Parties
Since Avenger’s slight nerf, Boarding Troopers might get taken a bit less, and therefore we stand a chance of seeing other boarding party cards showing up. Cham Syndulla and Darth Vader might see a small rise in play in the coming months.
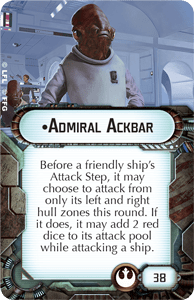
Ackbar
The nerf to flotillas is good new to slow-moving fleets, especially Ackbar fleets. That classic broadside fleet that was never able to chase down distant flotillas will now have an easier time securing victory. Additionally, Ackbar fleets have some extra flexibility in that Home One isn’t quite as crucial, in that you no longer HAVE to destroy enemy flotillas, so that one accuracy, while still great to have, isn’t quite as crucial as it once was. Perhaps now we’ll see more Ackbar fleets with only Assault Frigates? Same goes for any red-dice heavy list honestly. Imperial Cymoons and Arquitens based lists will have similar flexibility, in that they won’t absolutely need that accuracy for flotillas as much.
Ultimately, only time will tell how these changes will fully impact the game moving forward. All in all, I feel they are largely Quality of Life changes, meant to reduce negative play experiences and some “cheese” factor. You can head over to the Armada Errata Page for a summary of changes, and links to all relevant documents.
The original cards from the core set for Legion. Which ones should you eliminate? What do they do? What choice is best for me? I’m going to talk about all of that.
Deployment Cards
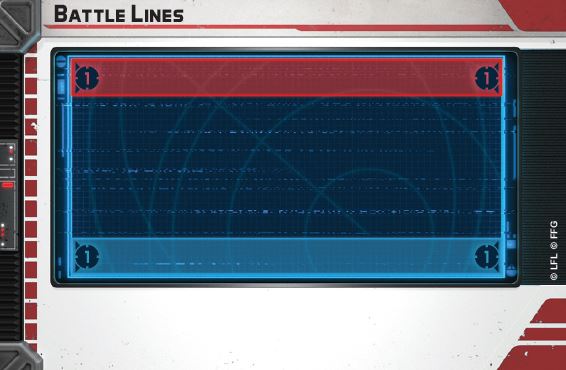
Deployment cards are going to tell you where your deployment zone is. The blue zone for the blue player, and the red zone for the red player. The numbers on the edges of the card, indicates how many range tools each section is, in terms of length and width. A (3) indicates it is range 3, or 18 inches (since each range unit is exactly 6 inches). Many of these deployment cards are going to force you to take a look at the terrain on your board, and determine which one will work best for your army.
Each card is going to by symmetric between the blue player and red player. For this phase, there really isn’t any difference between the two colors, so if you end up being the red player, don’t worry.
Battle Lines is easily the most basic of all deployment cards. It allows you to deploy anywhere on your side, within range 1 of your edge. This is fairly universal and gives most armies a lot of flexibility. It’s worth noting that starting with this deployment can have the highest potential of having shots fired on the first round, so be careful how far forward you start marching those first few troops.
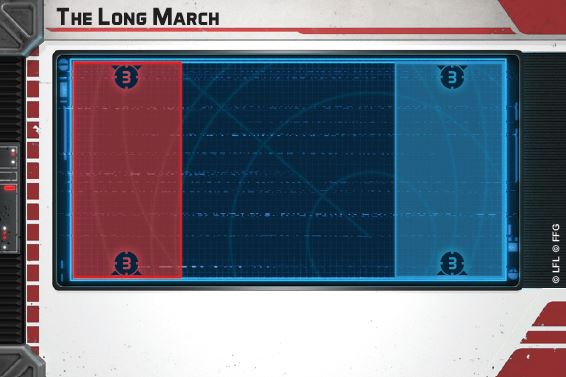
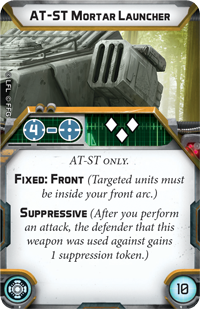
The Long March, is also fairly basic, but will have you playing at the short ends of the table, marching towards your opponents from potentially a longer distance. This one can be favorable to fast units, especially those with compulsory moves. This one can also benefit extreme long range attacks, like the mortars from the AT-ST, which have a minimum range of 4.
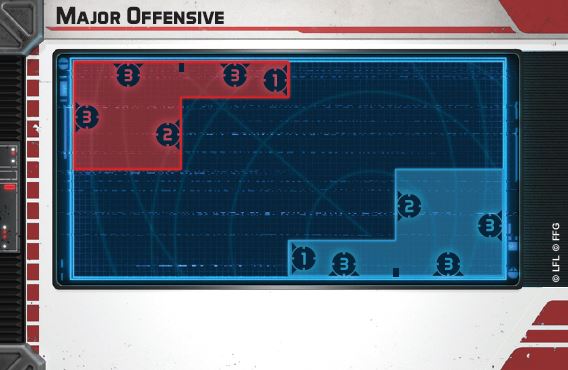
Major Offensive is giving each of you opposite corners, but it also extends moderately far into the center. This one is interesting in how it extends into different depths of the board, and can really depend on how your terrain is laid out, on weather or not this one works best for you. Generally, I tend to prefer this deployment only if I have blocking terrain near the center, but slightly closer to my side, allowing me flexibility of deployment, as well as covered approach paths, to objectives.
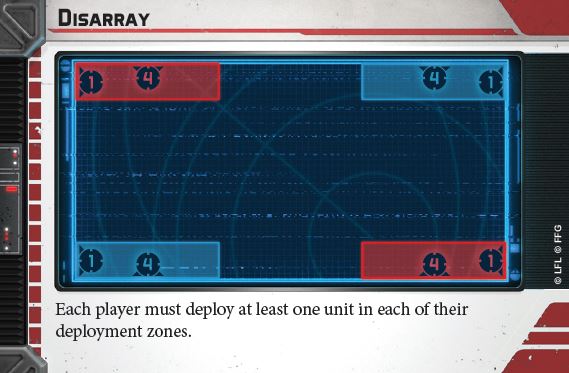
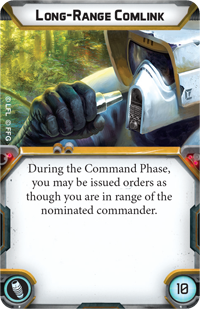
Disarray is the most difficult to set up for new players, and easily the most chaotic. Newer players are likely only have a single commander, and since it requires you to deploy units in BOTH corners, you are going to be forced to split up your forces in different areas, leaving some units beyond standard command range. This can work well however, with builds using cards to mitigate this distance, such as Long Range Comlink. Another way to utilize this deployment is to simply ignore the disadvantage, by focusing on corps units, and simply putting all of them on one side, and your commander plus whatever remains on the other corner. You’ll be able to issue orders to Heavy, or Support units for example from your commander, and then pull from the pile to get your corps units with ease. If you have 6 corps, and heavy, for example, this might work for you.
Condition Cards
Condition cards are telling you something about the condition of the battlefield you are fighting. Maybe it’s a bright sunny day, maybe it’s foggy, or snowy. Whatever the condition, it’s going to have an impact on your tactics. You’ll want to avoid certain conditions that might cripple your army’s strengths.
Clear conditions is simple. It has no effect. This is equally good for everyone, and that means sometimes you’ll purposely want to eliminate this one if the one behind it might hurt your opponent worse than you.
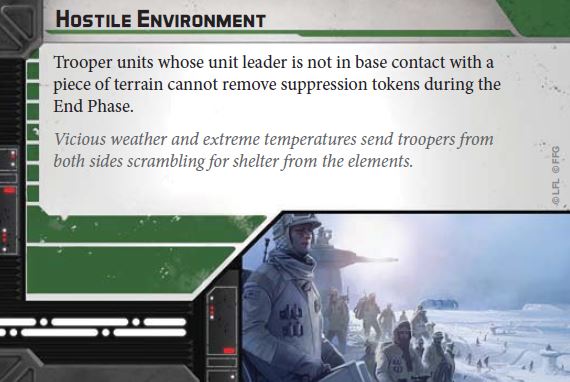
Hostile Environment makes it more difficult for troopers to remove suppression. It also means that trooper units are less likely to end up in the open, while trying to move from one objective to another. If you are particularly trooper heavy, and your battlefield has lots of wide open spaces, you may want to avoid this one. If you are using a lot of vehicles, your penalties here could be minimized.
Rapid Reinforcements is unique in that it doesn’t reference the battlefield itself, but rather the availability of the troopers within it. This one could potentially hurt a build that is maxing out on heavily upgraded troopers, as it will be far more difficult for a player to set aside 2/3rds of his stronger configured trooper units for a few turns of the game. If you feel like you have plenty of troopers, and can afford to play without them for the first few turns, then perhaps you may enjoy this one. As a side note – any future trooper units can also be effected by this card, so as more troopers enter the game, the tactics for this card may evolve.
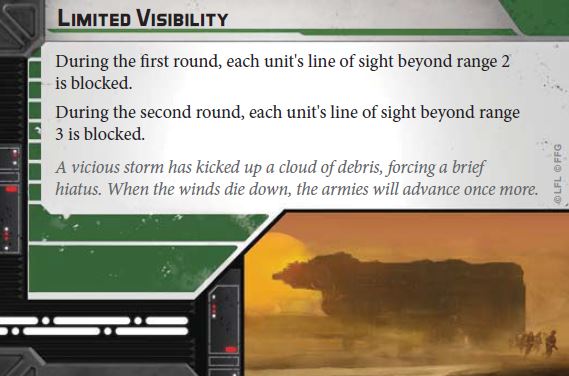
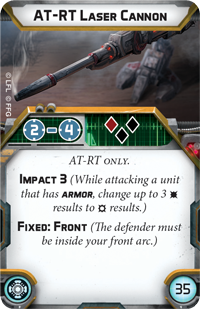
Limited Visibility is the best condition to have, if your opponent is equipped with long range attacks that they’d like to use on the first turn. If they are using Leia or Veers, then they’ll have command cards capable of striking you at distance 4 or beyond from the first turn. If they have long range weapons, like the AT-RT Laser Canon, or AT-ST Mortar Launcher, then they’ll also be at a disadvantage, unable to fire at you until after the fog has died down.
Objectives
Objectives are how you win the game. Well, technically you can also completely destroy all of your opponent’s units – but more often than not it’s going to come down to objectives. The right objective can make or break the game for you, so make sure you pay close attention to these.
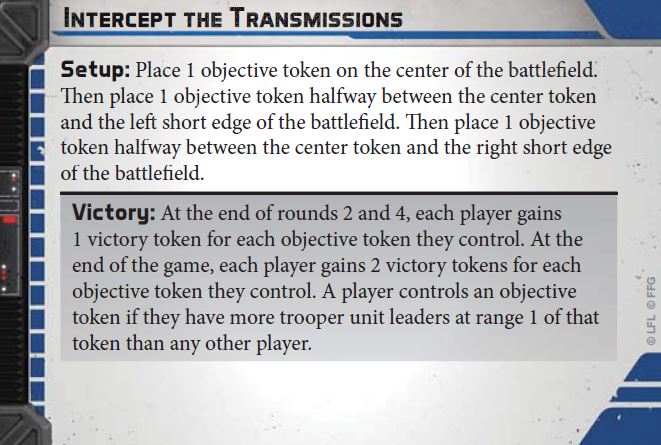
Intercept the Transmissions turns the game into area control. It’ll will most likely be a fight for the center, as typically one player will end up having an advantage on the left, and the other player will gravitate more to the right. If you have a build that can lock down 2 areas of the battlefield that you’ve built, then this might benefit you. Troopers are crucial for this objective however, in that only trooper unit leaders can give you control of one of the three objectives. A vehicle-heavy list is likely to struggle with this objective in that while vehicles may have some firepower, they have no ability to gain victory points.
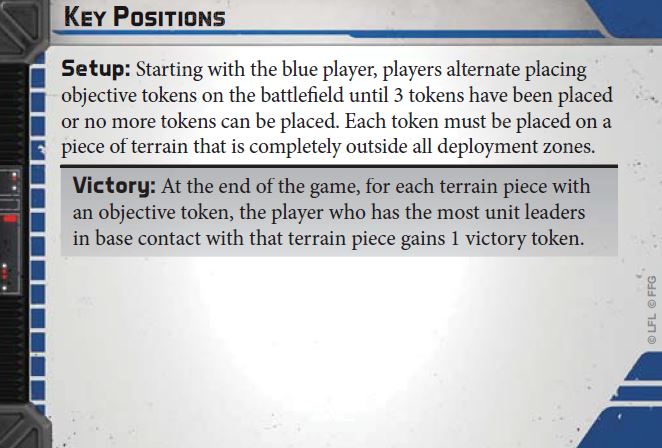
Key positions heavily favors the blue player. There are only 3 tokens to be placed and the blue player gets to pick two of them, which means they can select the two terrain pieces that are easiest to defend. Any type of unit leader can compete for control of the terrain pieces however, so vehicles are fine for this one. I like to think that AT-RTs with long range weapons like the AT-RT Laser Canon can be great here, since they can climb on top of an obstacle and hold it, while firing at a distance to cover another one. If you are the red player I’d seriously consider eliminating this objective.
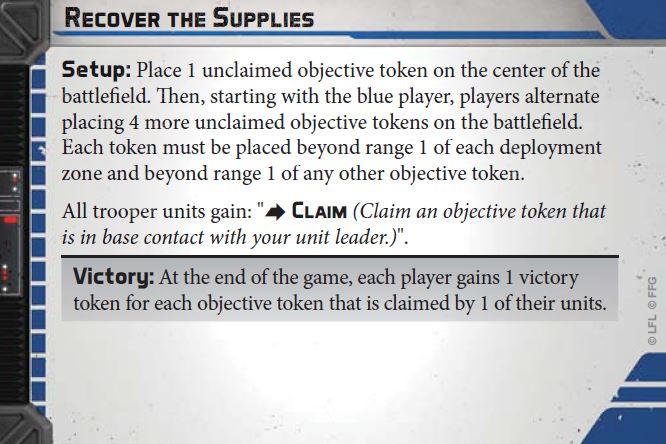
Recover the Supplies is another objective that heavily favors trooper-heavy lists. You are going to have to claim an objective, and keep it safe until the end of the game. If your build can put out a lot of suppression then you may be able to force enemies to panic, and drop their supplies, so that is worth considering. Also if terrain allows for strong hiding spots that block line of sight, you may want to consider claiming supplies and staying safe. Vehicle heavy lists may struggle with this one if they cannot get at least 3 tokens claimed and kept safe.
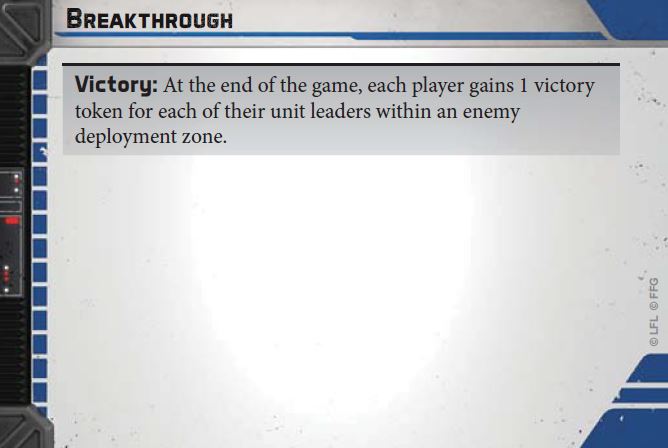
Breakthrough is a pretty fun objective and perhaps has the most interesting dynamic of all objectives that come with the Core Set. It makes your game almost feel like a sporting event that I might compare to a Star Wars version of Football. It favors the most units, and also favors fast units. Slow units will have difficulty making it to the enemy’s deployment zone, so if you have slower forces like Darth Vader, this one might not be the best for you. Personally, I’ve had success with this mission when using units that have high speed and compulsory moves. Even though rebel snowspeeders cost alot of points, they have the speed and survivability to spend a few turns shooting, and can make a break for the enemy zone right before the end of the game to make the difference. Generally however, if your opponent has several more units than you do, I’d steer clear of this objective.
In Summary
If you prefer a video instead of reading all of this, here is a video as well!
Hopefully you found this information helpful! Out of all the three card types, objectives are easily the most important, but they are also influenced heavily by the other two. The one constant that I’ve found, is that most winning builds tend to favor quantity, over quality – so the more units you have, and thus, the more unit leaders you have, the better your chances of gaining victory tokens and winning the game!


