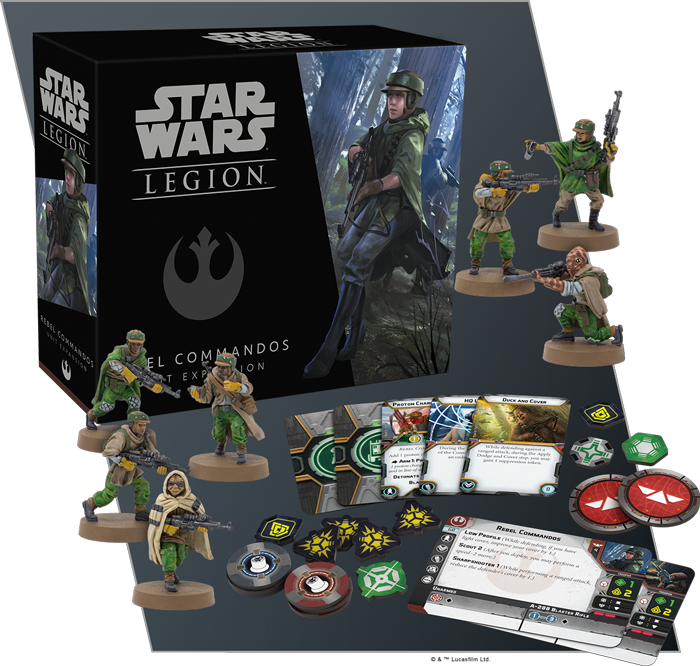
Now that the Rebel Commandos have arrived in Legion, you may be wondering how to best use these new versatile Special Forces units, especially since this is the first expansion pack to offer two units for the price of one! Lets break down the ways you can run them and which ways work best.
The Heavy Weapons

These are what make this unit shine. The DH-447 Sniper has unlimited range, pierce 1, and two dice ( albeit one of them is white). It also has High Velocity, which if it’s the only weapon in the attack pool, the defender can’t spend dodge tokens. It’s VERY likely to do damage, but only a little.
The Proton Charge Saboteur is the answer to swarm lists. Now finally, your opponent may have to think twice about grouping up 6 units of Corps close together! This unit can Arm a proton charge as an action, which places a charge within range. When detonated, these charges will make a ranged attack against EVERY unit at range 1 of it, one at a time. This is tremendous for multiple reasons, which include damaging groups of enemies, dealing out loads of suppression, and even hurting vehicles! The attack itself , which consists of one red die and two white, has Blast, Impact 1, and it’s own special Surge to Crit! Each Saboteur has Detonate : 1, which allows them to trigger ONE charge to detonate after ANY unit takes an action. This means, you can drop a mine, move out, and trigger your charge after you move. This also means you can run in, drop a charge, and immediately blow it, potentially hurting yourself! It could be dangerous doing the latter, but if that means you can hit 3 enemy units? It just might be worth it!
The Basic Unit
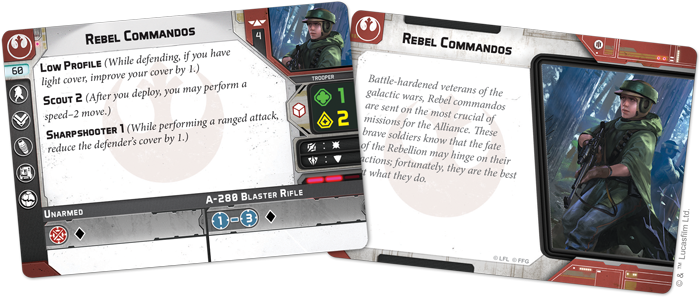
One of the first thing’s you’re going to notice, is the lack of a personnel upgrade, which means you aren’t going to be able to outfit this unit with six miniatures, so five will be your limit if you use a Heavy Weapons miniature. In addition, we get Comms, Gear, Grenades, and a new upgrade called Training, which isn’t half bad considering that we get Duck and Cover with this wave. As far as the rest of the stats, they are largely similar to the typical Rebel Troopers, with a few key upgrades (which help, considering they cost an extra 20 points). So what do we gain for those extra 20 points?
First off, these Commandos have both offensive and defensive surge, which is pretty nice to start. Additionally they have a courage value of 2, which helps them still get two actions even when they have a suppression token. It also makes them a decent commander if your commander should die. Their keywords however are especially helpful. Low Profile means you may seriously want to consider always running Duck and Cover. Scout 2 is incredible for early game positioning and objective play. Sharpshooter 1 is just all around good, though generally it lends itself to doubling up fire on a unit that’s already been shot and now has suppression, snipers, or both.
The Commandos are an all around solid unit – but you may not want to run them without a heavy weapons upgrade. Running them with only 4 miniatures can work if you’re looking for some quality trooper units for your build, but generally you’ll probably want to run some heavy weapons units. Before we talk Builds, let’s look at the Strike Team.
The Strike Team
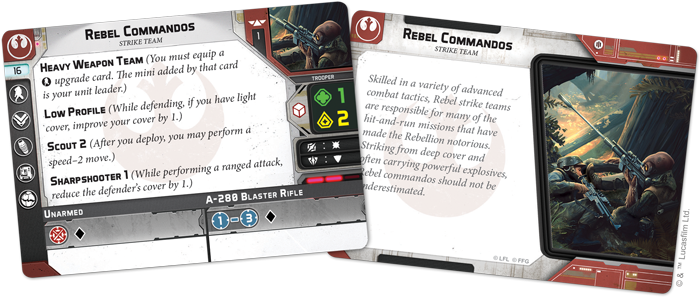
The Strike Team is almost identical to the standard Rebel Commandos card, with three key differences. First, the cost, which is only a mere 16 points! Second, the miniature count is only 1. Lastly, the keyword “Heavy Weapon Team”, which forces you to take a heavy weapons upgrade, which then becomes the unit leader.
The Strike Team is an ideal way to inflate your unit count, considering that a Strike Team can be as cheap as 42 or 44 points, depending on which Heavy Weapons option you select. For players who want to push the limits of units in a list for things like activation advantage, the Strike Team will prove an effective way to pad your activations, while also giving you some excellent tricks.
Which Configuration is Best?
For starters, I will suggest using the Sniper in a Strike Team, and the Saboteur with a full unit. This way you can have two distinct Special Forces units in the same list, with only a single expansion box. Other options certainly work, but not everyone will want to buy 3 boxes of commandos to try every permutation.
Snipers
Snipers work VERY well with a Strike Team. Having only 2 miniatures, gives them easier access to be deployed on smaller, narrow ledges. Additionally, camping a sniper in the corner of a map, often means the rest of the commandos are NOT firing their weapons. A Strike Team minimizes this by having only one miniature sitting around doing nothing.
Snipers don’t work as well in the full Commando Unit, because that generally tends to mean that you bring them into the battlefield, putting them within range 3 of enemy units, which someone diminishes their value a bit. However, it does allow you to more easily split fire, dealing out suppression, or combining the sniper’s weapon to give your larger attack Pierce 1. One other option is also to simply be a strong Counter-Sniper unit. A Five-Person sniper unit is much less likely to die from opposing sniper fire.
Saboteurs
The Saboteurs work a little better in a full unit, as they are more likely to want to get down into the middle of the battlefield and mine the heck out of it. Having additional miniatures also means that the saboteur has a longer lifespan, and thus, can survive longer. Don’t forget, your Saboteurs need to be alive in order to trigger “Detonate”. When your last saboteur dies, the rest of your charges can no longer be triggered.
The Saboteurs CAN also work well as a Strike Team, but this is one of those cases where I would advise to run more than just one. Strike Teams are cheaper, and that means more Saboteurs, and thus, more charges placed all over the battlefield. You could in theory place a maximum of 18 charges in a single game with three Saboteurs, and although that certainly won’t always be the case… being able to place several near key objectives is amazing. The other advantage of having multiple saboteurs is that you’ll have multiple instances of Detonate. It’s partially about redundancy, in that losing one saboteur will still allow you to trigger charges, but it’s also about having the ability to trigger more than one at a time. Blowing 3 charges when an AT-ST steps too close, and taking it from 6 health to dead in a single move… is really satisfying!
In Closing
These Heavy Weapon units really help make the Commandos Shine – so weather you’re trying to snipe, mine, or simply use the commando’s regular weapon to actually shoot enemies within range 3 – it’s gonna be a great time! Imperial Scouts will likely behave in a very similar fashion in terms of teams and pairings. Once those come in both sides will finally have Special Forces!
And if you prefer video – here you go!