Squadron Foundations – From Planning to Deployment

Squadrons are an crucial part of virtually every game of Armada.   Weather you are going heavy on squadrons, light on them, or focusing more on dealing with enemy squadrons, they are something that every build needs to consider.   In this article I’m going to talk about some of the cornerstones of a squadron build.

Plan

The first thing you need to do is figure out an overall plan of what you are trying to accomplish by adding squadrons to your fleet.  This will help guide how many you need to add,  what keywords you’ll want to include, and what overall point cost you should be shooting for.

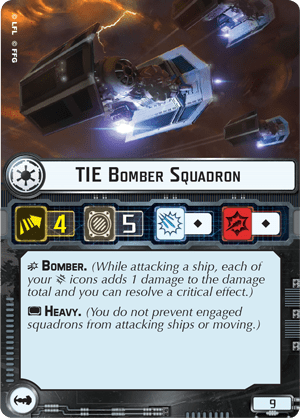
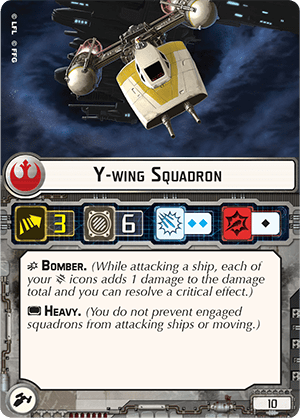
One common strategy is to bring some bombers.   Bombers are most effective at hurting your opponent’s ships, but they tend to be weaker when compared to enemy fighters, so you’ll want some supporting squadrons as well.   You may want to consider some Escorts, for example, which will increase the number of squadrons you’ll have to bring overall.  Bomber-Heavy builds tend to usually run alot of squadrons and push very close to that 134 point limit.

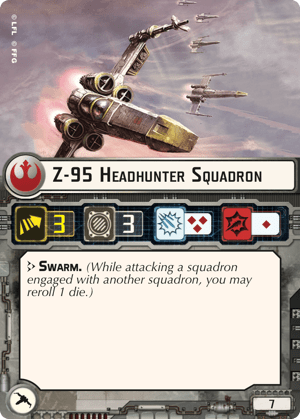
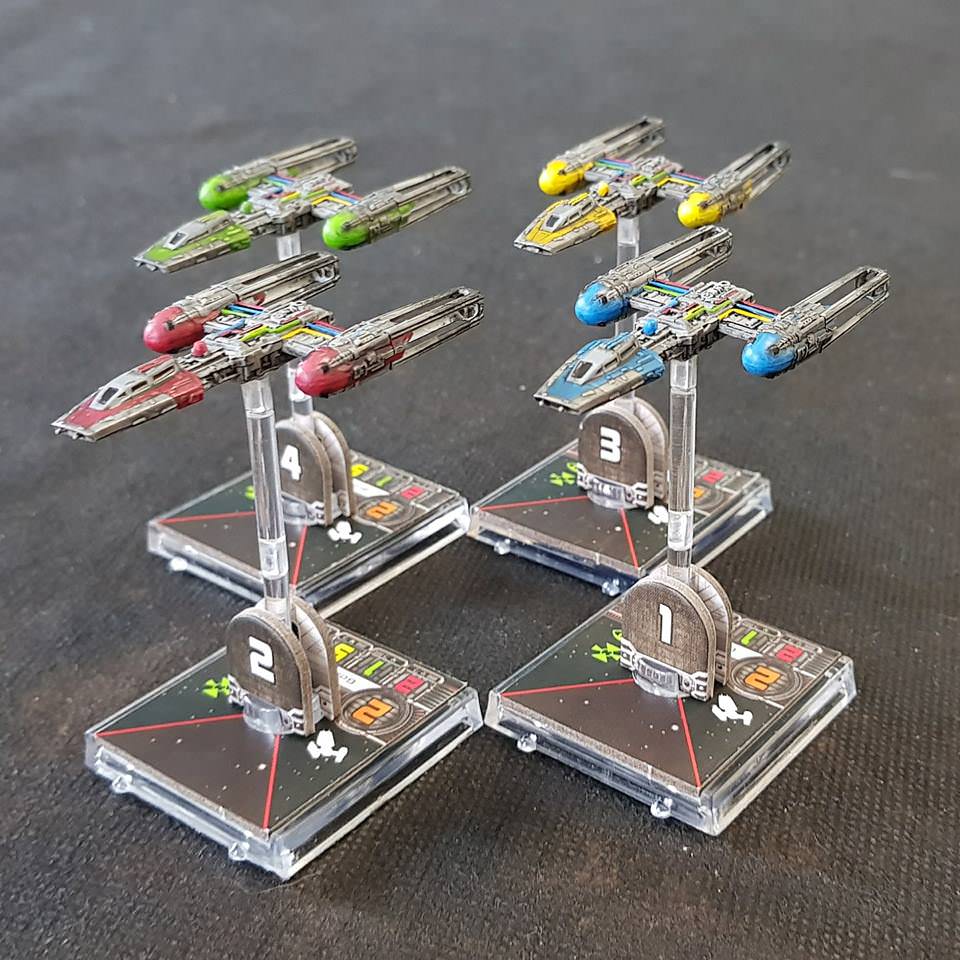
Perhaps you only want to bring a few squadrons, merely to help slow down your opponent’s squadrons from hurting your ships.  A handful of TIE Fighters or Z-95s will usually do the trick, but you’ll generally want an even number, since you’ll get more of a deployment advantage by having multiples of 2.   In these cases it can be a good idea to bring at least 2, but perhaps even 4 or 6 if you want a more versatile fleet.

Synergy with Rest of Fleet

Once you have a plan you’ll want to make sure your selections match up to the rest of your fleet’s capabilities.  Make sure that your ships can actually activate your squadrons.  You wouldn’t want to have only Arquitens, or CR-90s and also have 12 Squadrons to support.  Ideally you’ll want to have your carriers, (generally ships with higher squadron values) be able to activate nearly all of your squadrons if they all performed a squadron command.   If you aren’t running carriers, you could also consider running a pair of squadrons with the Rogue keyword, which wouldn’t require squadron commands.

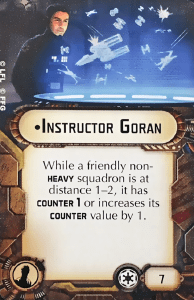
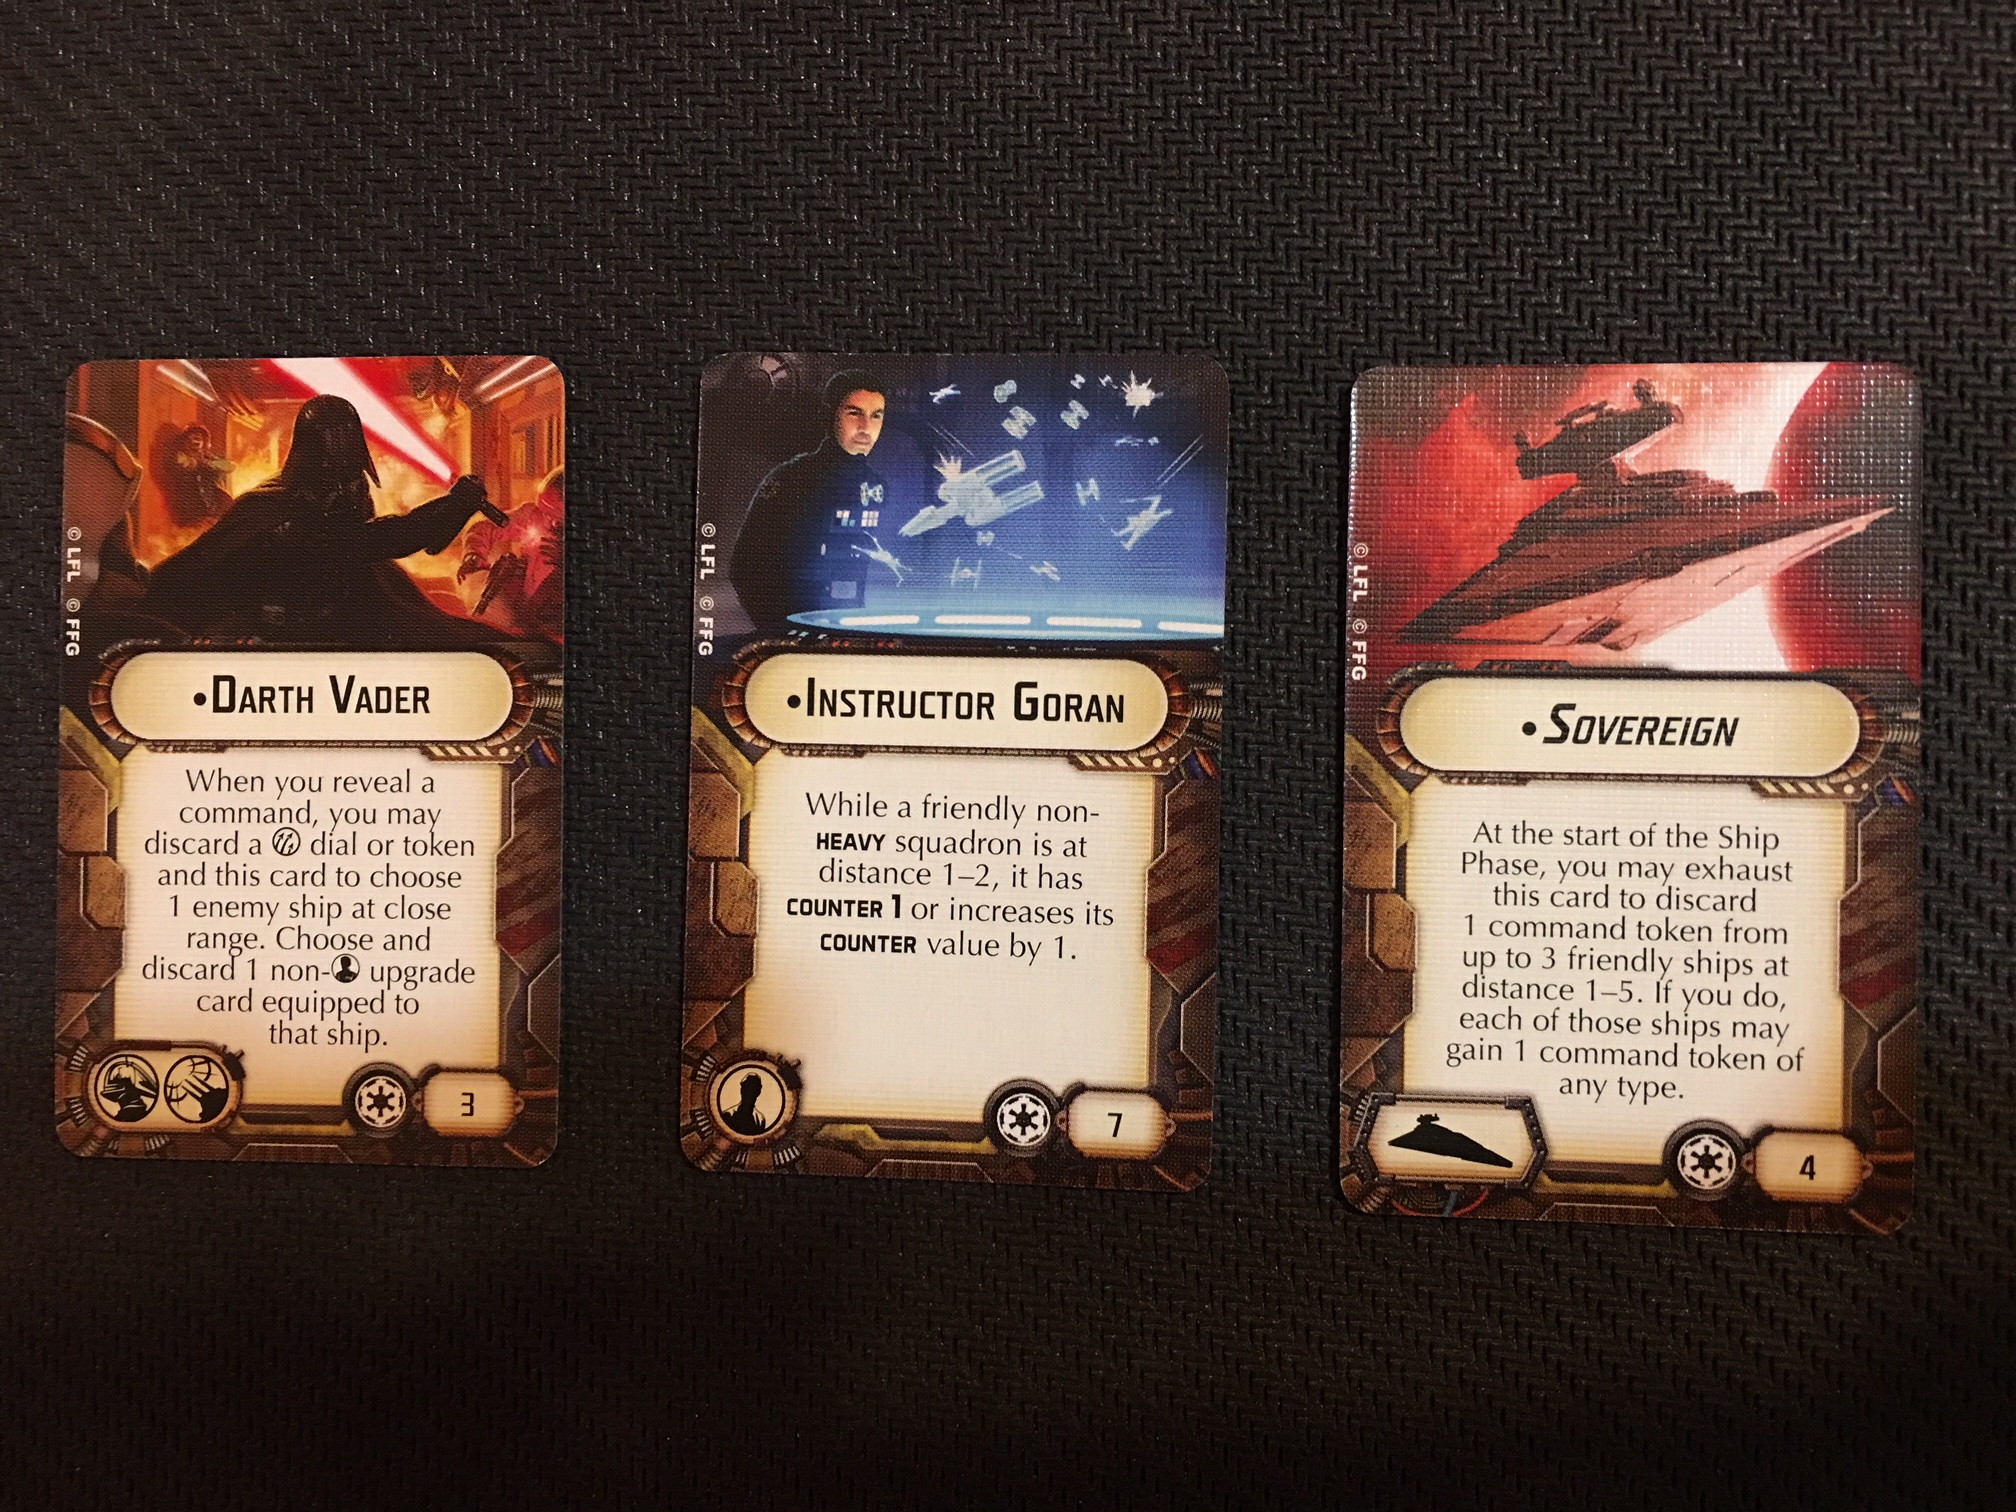
You may also want to add some upgrades to your fleet that enhance your squadrons.  A Bomber Command Center staying near your bombers can have a tremendous impact on your offensive capability.  Similarly, adding Instructor Goran to an Imperial Fleet that also includes Dengar, can have a very high boost on your fighters’ ability to counter attack.

Variety

Adding a variety of squadrons to your build will greatly enhance your flexibility and allow you a greater chance of overcoming most fleets that you face.   Any fleet that has for example, only bombers, might suffer due to their lack of offense to other squadrons.  Any fleet without even a small squadron force, won’t have much to defend against a swarm of enemy squadrons and will quickly face what is often known as “Death by a thousand cuts”.

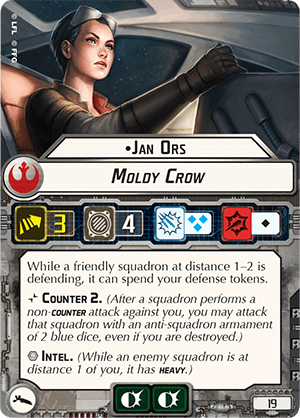
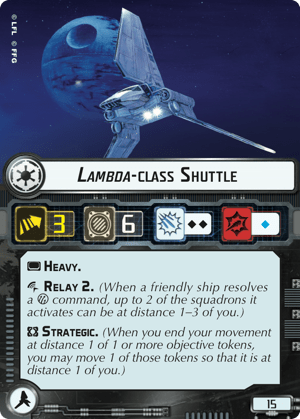
Intel is one of those keywords that really gives you tremendous flexibility, in that it can prevent a single enemy from locking up your entire squadron force.  It helps bombers attack ships and avoid interruption, and keeps your fighters mobile.  Relay is another keyword that gives you the ability to stretch your squadrons further away from the safety net of your ships.    Adding multiple keywords to your fleet allows them to stay flexible and effective.

Deployment 

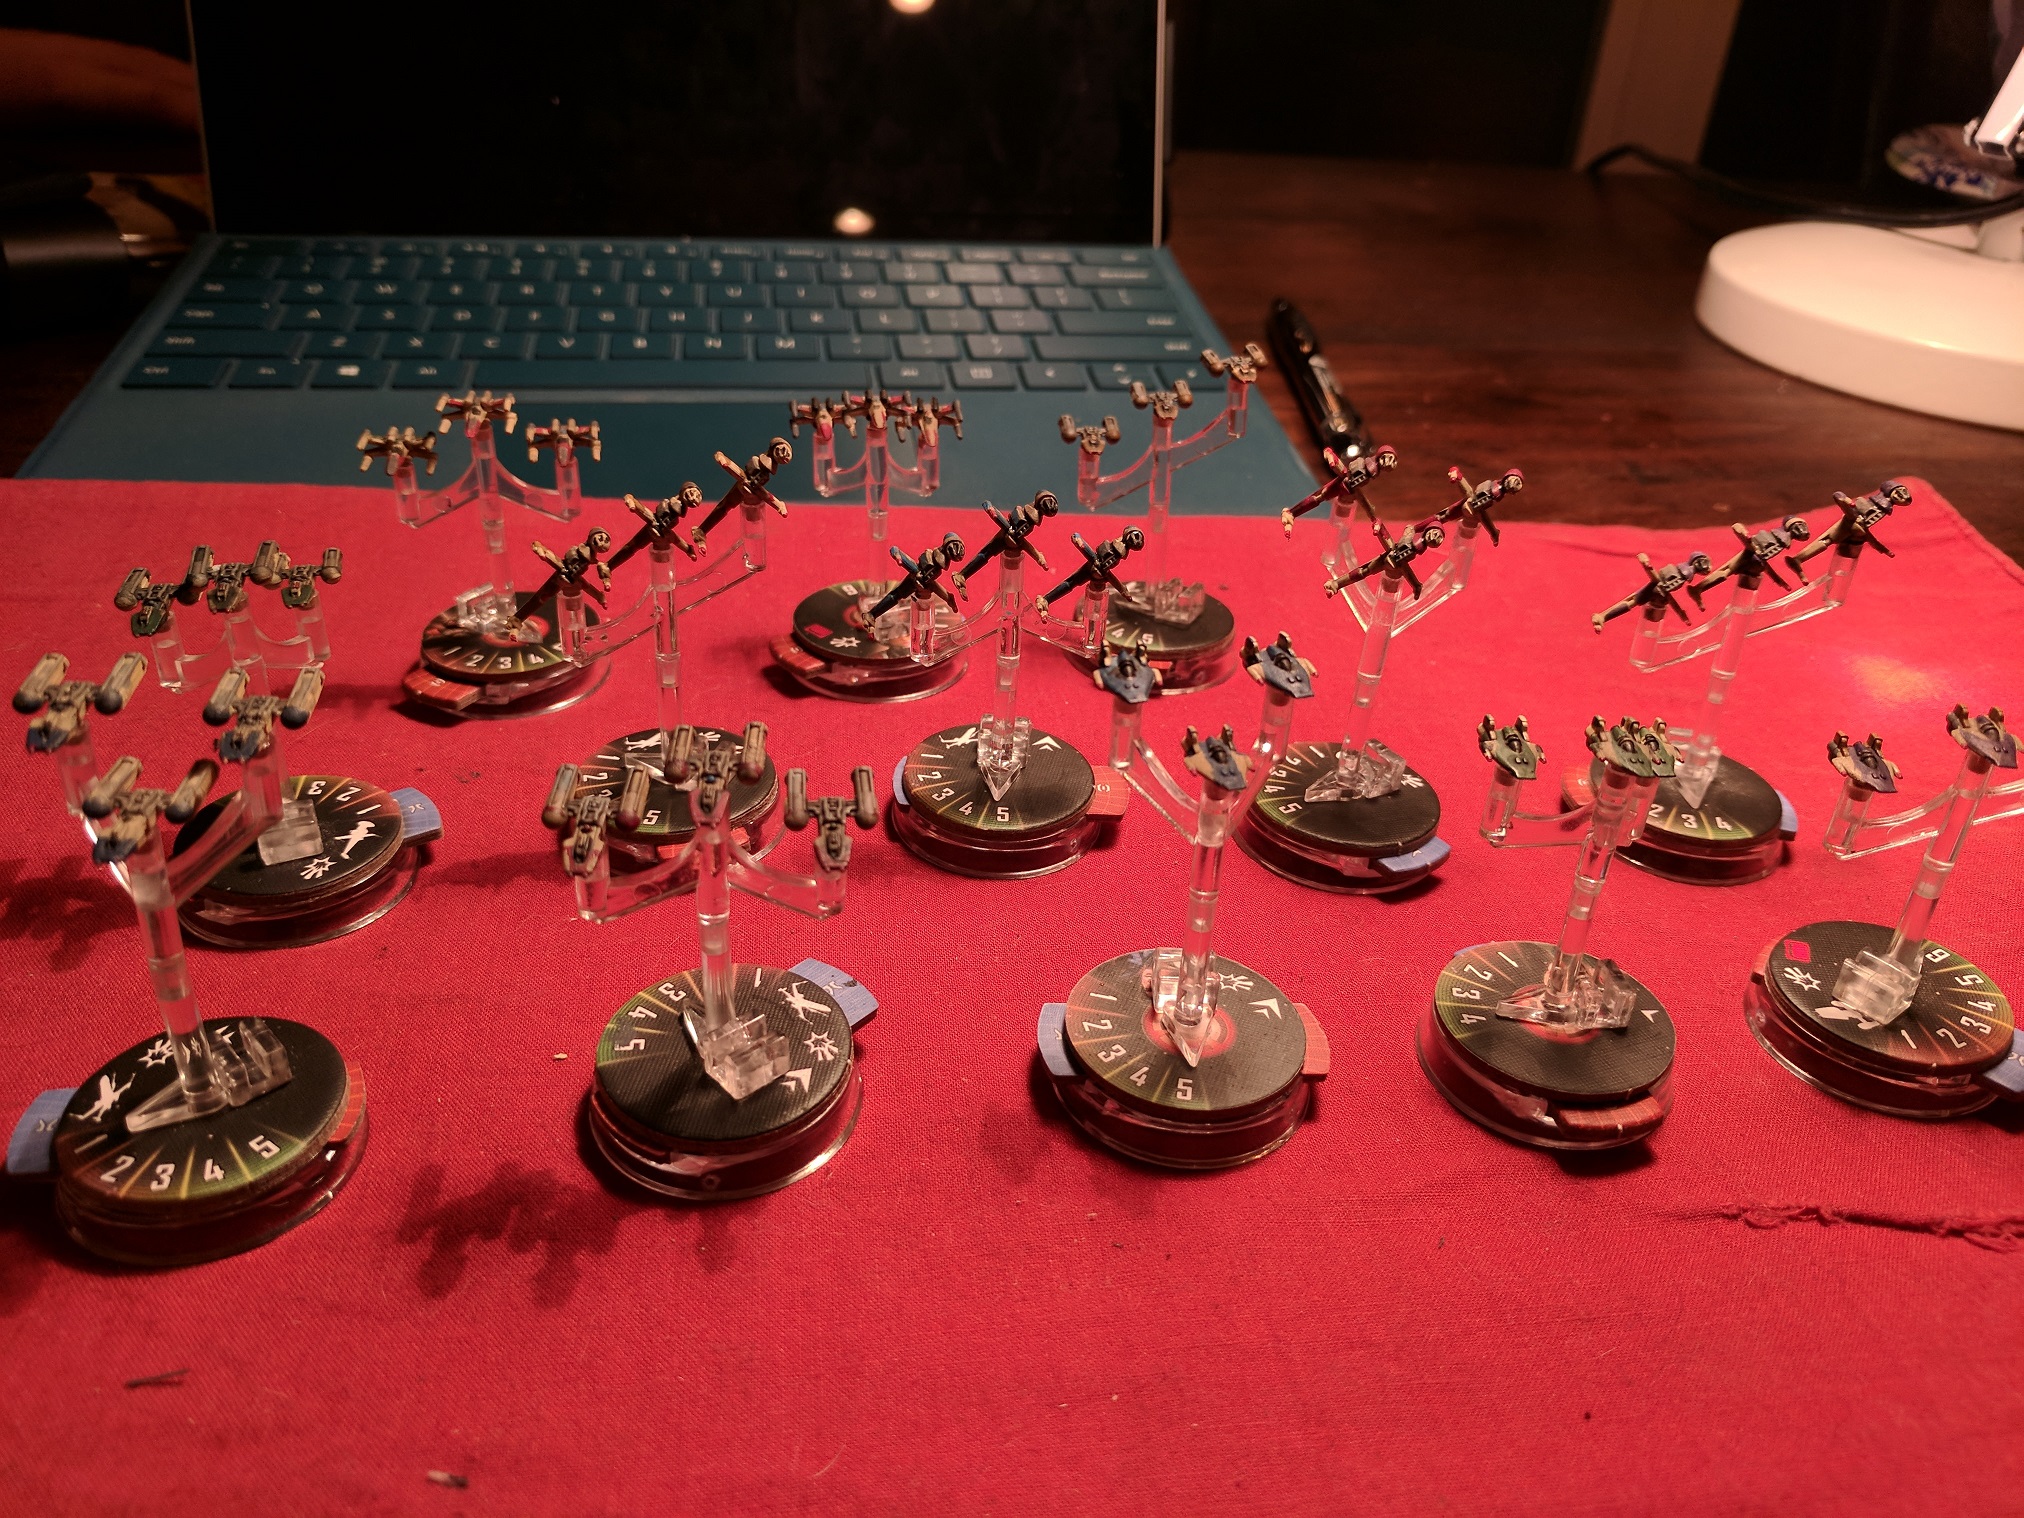
Most of the time it is best to include even numbers of squadrons, due to the fact that you deploy them in groups of two.  If you have enough squadrons, you can out-deploy your opponent and delay your important ships until the end.  This is known as Deployment Advantage.  Deploying 2 squadrons, in place of a ship, is one of the biggest advantages in the early game, and it’s a mistake that many new players tend to make, by forgetting their squadrons until the end.  It is almost always best to save your biggest ships until the end when you deploy, and taking larger amounts of squadrons allows you to delay your ships, gives you intelligence on where your opponent is deploying, and allows you to protect your valuable ships.

If you are interested in more information on how squadrons can influence deployment and give you deployment advantage, check out this video demonstration!


More painting!

Armada Wave 7 has finally come out and I’ve made it a point to paint at least ONE of each of my rebel ships.    Since I recently did one of each Imperial ship I decided I’d follow up for the rebels with an Oceanic theme to represent the fine Mon Calamari people, but accent it with some flames to represent burning oceans, or their fighting spirit.

Picture of painted rebel ships
Some of the first rebels I did with the “Blazing Oceans” theme.
More Painted Rebel Ships
Another Batch, including Wave 7’s MC-75. I didn’t give the MC-75 the flames yet, not sure if I will.
Close up of MC-75
The MC-75’s Armor was fun to do, taping off everything else, and multiple layers of light grey and mixtures of darker black and hints of blue.
Picture of all Armada ships, painted.
Here’s all of my airbrushed ships.

Scanned Images

I’ve had a few requests for Scanned Images of the Wave 7 cards and tokens as well.  My scanner isn’t the best, but hopefully this will work!

Armada Wave 7 in hand!

Armada Wave 7
Look what Santa Brought!

It was just a normal night, in fact I was getting ready to play some Armada with a friend.   When suddenly, my doorbell rang.  It was late, and the kids were already in bed.   Curious as to who could have been at my door this late, I opened the door to see that nobody was there, but instead a package was laying at my door!  FFG had sent me these two ships to review!   I showed my friend and immediately we knew that the game we wanted to play was going to have to wait so we could dive right in to these expansions!

Armada wave 7
The Profundity and Chimaera are gorgeous!

First the Chimaera – I was really pleased at the fact that the paint job is on both the top AND on the bottom.   A really nice touch.  This expansion really does a lot to emphasize large ships and make them more competitive, which has been one of my top complaints in the game so far.   Additionally, the explanation of raid tokens that comes with the rules, clears up all of the speculation as to how we can get rid of them.   You can either spend a command token to get rid of a matching raid token, (Making commanders like Tarkin and Garm more useful) or you can spend an entire dial, to get rid of ALL raid tokens.   Additionally the Gauntlet Fighters are gorgeous, and Gar Saxon’s ability to finally harass squadrons with Intel or Relay, begin to address my other concern with this game, in the form of Relay.

Another thing that is great about this set is the fact that it comes with enough new Star Destroyer cards to outfit itself and 2 additional Star Destroyers, so you can take 3 brand new ships into battle using the cards that come with this expansion!   Considering that you get all that plus two new squadrons, this is one heck of a value for a single box!

Now the Profundity expansion was really something special.   First off, I think this ship may be the best looking ship the rebels have in game up to this point.   Honestly, it is just jaw-dropping.   Like the Chimaera, it comes with lots of good cards that will really help large ships, and some duplicate cards that means rebels players won’t have to buy the Chimaera just to get a copy of Strategic Adviser.

Additionally, cards like Bail Organa offer a asymmetrical counter to cards like Governor Pryce.   And considering new Hyperspace Jump mechanics, that show up with the Profundity title and Admiral Raddus himself, the rebels gain a unique tactical advantage in their ability to deploy ships almost anywhere on teh battlefield!  With an emphasis on large ships and tokens, this looks to be a truly amazing ship!

Is this going to be an amazing wave or what?

Here are some higher rez pictures of the unspoiled cards:

Type O Negative Fleet

Growing up, my favorite band was Type O Negative.  This was a major influence on me and why my favorite colors are black and green.  (Also helps that Luke in ROTJ was basically those same colors as well).  So when I got an Airbrush for Christmas, my first major project was going to be to repaint some of my Armada ship that I’d previously screwed up on and wanted to repaint them.

Here’s the video of the Livestream if you are interested:

The end result wasn’t half bad.  Here’s how they came out.

So the next day I went back and added some details.  I did some panels in grey, and then added tiny white dots where I thought lights should be.  I think it came out pretty good!

Here are some more closeups:

This is part of the reason I’m now trying to manufacture reasons to use these 3 ships in a list!  Might have to repaint some squadrons soon!

Taking a look at Raddus

At the time of writing this article, we still haven’t seen a good preview of the Profundity expansion so I’m doing this all based on what little we know about Raddus. 

So Raddus hasn’t seen a whole lot of attention yet in the big hype train surrounding Wave 7 for Armada.  I’d say primarily because of 2 mains reasons.  First, Thrawn’s expansion, the Chimaera, has gotten most of the attention thus far with several articles, and Secondly, Raddus at a glance, appears to give us something we already have access to – a Ship warping in.

Now we’ve already seen a similar mechanic when it comes to the Yellow Objective, Hyperspace Assault.   I think that I wasn’t initially too impressed with this commander because of that.   It didn’t feel “fresh”.   It didn’t feel “new”.  But once I looked closer I realized this guy is far superior to that objective and has an awful lot of versatility.  In fact, I think Raddus actually takes the place of “Top Strategic Master”, whereas most people may have expected that title to go to Thrawn.

Raddus Bomb

We know now (thanks to the latest FAQ) that you will lose the game if you deploy 0 ships, so you’ll need to start with at least something perhaps a cheap small ship.  But the Raddus Bomb is a strategy that involves having multiple ships deploy at the same time.   If you are using Hypserpscae Assault you can effectively have Profundity dock a CR-90, and have an Assault Frigate off the map with Hyperspace Assault, (Have that Assault Frigate equipped with Rapid Launch Bays – docking 3 B-Wings, plus your 3 from hyperspace assault), and effectively surprise an enemy with your Assault Frigate warping in with 3 Squadrons, (then it can do a Squadron command and deploy it’s own docked squadrons for a total of 6), then Warp in Profundity, and then deploy a docked CR-90.  This can be a really fun way to go, but you run the risk of having your lone ship destroyed BEFORE you deploy everything else – and if that were to happen you’d instantly lose.

I’ve looked deeper at Raddus and think that more subtle usage of his ability might be a more effective approach to bringing him into games.

No Size Restriction

Raddus is better than the Hyperspace Assault objective’s benefit for a multitude of reasons.   First, you aren’t restricted to only small and medium ships, which means you can take that loaded up LMC-80 and surprise your opponent with it.   LMC-80s make for excellent flanking ships, with the ability to move at speed 3, take gunnery teams, and hit you just as hard as an Imperial Star Destroyer, being able to surprise an enemy with one of these is going to feel great!

No Deployment Disadvantage

Similar to how Governor Pryce allows an Imperial Star Destroyer to gain an advantage by activating last, Raddus can act alternatively for the Rebels, and allow you to DEPLOY last.   By using his ability during the FIRST turn of the game, you’ll effectively have the final deployment.  This is perfect for flanking ships, but also it allows you to adapt to any objective that might want you to put a ship somewhere without broadcasting your plan to your opponent during setup.  Also, if you deploy that big flanking Spinal Armament, Gunnery Teamed MC-80 Liberty at the start of Turn 1, you can gain 2 smaller advantages as well, in that you A) can push it past the normal deployment zone a bit, and B) won’t suffer from the penalty of not being able to activate it first.

This is especially powerful if you end up being first player, as you’ll have an MC-80 that may end up deploying at it’s furthest forward spot, past another forward ship, and at speed 3.  This will put it in prime position to shoot first on turn 2.   You might even find yourself in a position to destroy two enemy ships at the start of the second turn this way.

Speeding Up the Slower Ships

Another option is to take a Home-One style MC-80, and drop it at the start of turn 2, directly in the path of your enemies.   Set one of your smaller ships to speed 3 or 4, and get them close enough to the enemy fleet that a large ship deploying at that point will really screw up their plans.  It’s a tough enough ship that it can take a beating and survive for a turn or 2, and it’s large enough that it’ll likely cause some bumping.   Bonus points if you can force enemy flotillas to bump!  Then when you do activate it, you’ll have those tremendous powerful side arcs in close range of your opponent’s ships!   The best part is that you’ll be able to choose where you place the MC-80 so you might even end up with both side arcs having a great shot!  You can also probably leave off certain upgrades like Engine Techs, since getting into position will be done for you already at that point.

Rise of the Interdictor

One side effect of Raddus is that the Interdictor will likely see new life.   I don’t think the Interdictor is bad, or has been bad, but it’s certainly not a power player in the top lists, and it’s more of a niche ship that seems to do best in objective-focused lists.   Now it’s going to have a new purpose with the GX-7 Grav Well Projector

The latest FAQ has stated that these projector tokens remain in place for the entire game.  That means that enemy ships that “deploy” after the start of the game, are also vulnerable to the effects of the grav well projector.   Having your 150+ point MC-80 deploy, and get set to speed zero is a real problem, especially when you can’t activate it first.  That means your opponent will get at least one chance to shoot you, and you will NOT be allowed to spend any defense tokens.  This could allow even the strongest ship to potentially be killed in a single attack.   It may be a good idea to bring along Lando Calrissian just in case this happens.  The good part, is that these tokens have to be placed before deploying fleets, so that still gives Raddus a fighting chance against Interdictors.

But will we see fleets with multiple Interdictors in the future?   I doubt it, but with the release of Wave 6’s Disposable Capacitors, Interdictors are stronger and can actually deal out some damage even at long range now, so it might just be a thing, depending on how prevalent Raddus becomes.  Counters are a good thing – they keep one list from running wild – and even though I doubt we’ll see double Interdictor Lists become widespread, it’s nice to know that there are some effective measures to stop this master Mon Calamari from running amuck!


Wave 7 was just sent to the printer finally – so it’s looking like we might actually have them in our hands at some point in the forseeable future!   My hopes for Q1 are small, especially since FFG deliberately said “Early” 2018, as opposed to Q1.   I would bet on a July release at this point.


Governor Pryce, First Impressions

We got another article today about Armada’s Wave 7 from the new article today, from FFG.  In it we got a very interesting glimpse of a new officer, designed by 2015 World Champion Jonathan Reinig, Governor Pryce.

Restrictions – She cannot be used on small ships, and at first glance, seems to be very powerful on an ISD.   No longer will 2 or 3 ship lists feel quite so pushed to add flotillas in place of squadrons or upgrades.   Well, that seems to be the idea at least.  I feel like the hope here, was that a two ISD list would be able to delay one of it’s activations until the end, forcing an opponent with say, 4+ ships, to move them all into engagement range, and giving Pryce’s ISD the lion’s share of targets.   That might work for casual games but I think there are some problems here, beyond the fact that it can only be used once.

Broadcasting Your Plan

The good people over at CannotGetYourShipOut tend to often emphasize the risks when you basically tell your opponent what you are planning to do.  Here is a perfect case where you are doing just that.  If you select the ROUND 3 token, for example…. your opponent knows that you are planning for round 3 to be your power turn, and can typically adjust their tactics accordingly.  If this were the case, an opponent could simply wait for you to move Pryce’s ship turn 2, then speed up to put all ships in range, ready to shoot at the start of turn 3.   (Also there may be some shots fired turn 2 as well).

MUST can be a Bust

This card says you MUST activate at the end of the chosen turn.   Which means if you’ve only got a 2 ship list and have activated your first ship, you have to just sit there while your opponent activates ship after ship, slugging Pryce’s ship with volley after volley…. and THEN moving out of the way.  If her ship even survives, it may not have any good shots left against an experienced opponent.  If this didn’t say “Must”, then at least you could REACT to an opponent’s ever-changing strategy – but in this case your hands are tied.

Squadrons

Heavy carriers might be a smarter move when assigning Governor Pryce, as you’ll be able to stay a bit farther away and still get some versatility out of the squadrons that you activate.  However, great carriers like the Quasar tend to want officers that will give some nice synergy with  their squadron abilities, like Wulf Yularen, or even Admiral Chiraneu.  Also, a quasar is cheap enough that it probably is never going to run in a 2 ship list, or really fear for activation disadvantage quite like an ISD will.

So which turn SHOULD you select?

First thing’s first – before you select a turn with Pryce, you are going to have to read the battlefield.   You are going to look at where your opponent placed ships, how far away they are, and what speed they are at.   You are going to have to look at their ability to modify speeds beyond simple navigation commands, (Ozzel, Flotillas with Comms Net, etc).  And you are going to have to think about what offensive capabilities they have.  Do they need to be in close range?   Are they most effective at long range?  All of these things are going to factor in to your decision.   But the simple answer I think, in many cases, will be to select turn 2.

Why turn 2?

Turn 2 may turn out to be the optimal turn primarily because it won’t give your opponent as much setup time to exploit your inability to activate.   You don’t want a fleet of MC-30s to be able to boost up to speed 4 and all jump into close range of Pryce’s Star Destroyer and attack with impunity.  You don’t want a 7 activation list to be able to take 7 separate shots on your front hull zone before you can react, and you certainly don’t want those shots to kill you before you get to use a ship that you likely have 130+ points invested into.  In some cases where the opponent’s fleet is slow, and they deploy at speed 1, you will probably feel safe to select turn 3…. but in most cases Turn 2 will probably be the safest bet.


In closing I think this is a step in the right direction for large ships.   It’s not good enough on it’s own, and I think it would be 10x better if it allowed you to ignore the card’s text and activate as normal if you needed to, however it is interesting and different, and addresses an important weakness of large ships.   I’ll certainly try it out at some point.


Contest Finalists!

It’s been a great contest with over 60 submissions!   I’d like to thank everyone who entered!   Submissions are now closed, but you are still more than welcome to add some more paint jobs to the forums if you simply want to share!

I’ll be announcing the winner of the Legion Core Set, as well as the winner of the door prize in the next day or 2, so make sure and check back often!

I’ll be narrowing down the paint jobs soon, but here are some of the finalists:


Here are some thumbnails of the submissions we got over on the forums!


The Original Blue Objectives

The Original Blue Objectives

This third installment of objectives are dealing with the original blue objectives that come in the Armada core set.  I also have covered reds and yellows, and will soon be covering the objectives in the Corellian Conflict as well.  Lets get started!

This one is a simple points race.   You land a ship on an obstacle, and you can gain a victory token.  It also has the clear benefit of allowing the 2nd players ships complete immunity when landing on asteroid fields and debris fields.  There are some common questions with interactions here that have been answered in the FAQ as well.  First – Grav Shift Reroute moves these obstacles, the tokens move with them.  Second – Squadrons with Strategic are allowed to move tokens off these obstacles.   In that case, the tokens must be placed back on an obstacle before it can be removed for scoring.   And if a ship lands on an obstacles with multiple tokens, you only remove one token each time.  See the Armada Errata page for a link to the latest FAQ.

Why you should include it:

One thing that’s nice is that you’ll get the ability to move through obstacles unhindered and your opponent won’t.  Large Based ships can certainly take advantage of this.  Also, if you are running Grav Shift Reroute you can pull some of these obstacles closer to yourself to make collecting them easier.   This doesn’t give a ton of points though and isn’t terribly strong, but it also typically doesn’t help your opponent either.

If you are 1st Player:

If you’ve got Jaina’s Light in your fleet, is usually a sure thing to select this objective, because you’ve already got a ship that can land on those obstacles without taking any punishment!  Also if you are running an Interdictor with a Grav Shift Reroute of your own, you may be able to reverse the placement of some of these rocks and pull them closer to yourself, giving you an advantage.


Another points grab, but this time it’s winner-take-all.  Flotillas have made it easier than ever to send a ship after one of these objective tokens.  Years ago, this objective used to be very bad for Imperial players who tended to run a Demolisher, and either VSDs and/or ISDs.  An Imperial Player typically could NOT afford to send any of his or her ships out chasing after objectives, so this was an easy pick for rebels running a lone CR-90.  Nowadays however, flotillas are so common that this becomes a more risky objective to take, as it can easily be turned against you.

Why you should include it:

If you’ve got several Strategic Squadrons and ways to give them extra movement, such as Squall, Fighter Coordination Team, or Adar Talon, you’ll have a much easier time of quickly grabbing three tokens.  As 2nd player you’ll be able to place 3 out of the 5 tokens, so be sure and place them in such a way that you’ll be able to get to them before your opponent.  You also want to ensure that you can keep your objective ship alive.  For Empire, consider something like a Gozanti with Minister Tua and Electronic Counter Measures.  For Rebels, a Bright Hope with Major Derlin would prove incredibly hard to kill.  Fast ships like Raiders and CR-90s also can make for good objective ships.

If you are 1st Player:

If you’ve got more Strategic than your opponent, and think you can get to those objective tokens before your opponent can, then you can turn this against him or her.   Alternatively, if you’ve got a force that can quickly kill their objective ship, then you can also stop them from collecting points.  A swarm of CR-90As with Turbolaser Reroute Circuits for example, can quickly move into striking distance and concentrate on a lightly defending objective ship.


A classic objective of telling your opponent which way they should approach.   This one used to get used a ton before Strategic came around.  Now it’s quite risky to use this if you don’t also bring in some Strategic Squadrons of your own.

Why you should include it:

If you’ve got Dodonna, you can trigger his ability if your opponent trips one of these mines and rolls a crit, so that is a very fun part of this objective.   It also helps you generally control which ways your opponent can come into the fight, so if your fleet is very vulnerable to flanking this one can help.   You’ll probably want to include some Strategic into your build, just in case your opponent has some Strategic of their own.  And if not, it helps to re-purpose those mined that your opponent managed to miss.  It’s great to push them again and again!  Also, keep note of your opponent’s build.  If they don’t have any strategic, you might even consider putting many of these mines closer to the center of the board so you can push them all directly into your opponent regardless of where they deploy.

If you are 1st Player:

If you’ve got several Strategic Squadrons and your opponent does not…. then absolutely pick this one.  Nothing is more satisfying than pushing the 2nd players mine field back on themselves!


In my opinion, this one is by far the best of the original blue objectives.  This one is especially helpful with modern fleets that might only run 2 or 3 activations.  I also think this will be especially good in the future, with Wave 7’s new large ships.  It punishes the 1st player by making them deploy EVERYTHING first.  It takes away any deployment advantage they had.   And it allows rear shots to reward both of you with victory points. Rear shots SHOULD be easy since you can see where your opponent is setting up.

Why you should include it:

This one is great for any list that has a big deployment disadvantage.   3 or less ships, for example.  This list can also be very nice if you’ve got a good number of squadrons that aren’t likely to get engaged and locked down.   Squadrons with Rogue are particularly nice here, but Intel will easily help your squadrons get rear shots.   Maneuverable ships will also help you sneak around slower ships and get those rear shots as well.

If you are 1st Player:

If perhaps you were going to have a deployment disadvantage either way, then you really didn’t lose much by selecting this one.   Perhaps you are running a 2-ship build heavy with Squadrons?  Just set up in the middle and adjust accordingly – hoping your squadrons will get you a ton of victory points.  Make sure you get those rear shots!


Hope you enjoyed my breakdown of the basic blue objectives!   I’ll be covering the Corellian Conflict soon so check back often!

The Original Red Objectives

The Video – In case you prefer.

A long time ago when Armada was still new, I had started doing a series of videos on objectives, but never finished them.   I’ve decided it’s time to revisit Objectives and I’m going to start out with the Original Reds!  These first four are the originals.  The Classics.  They came with the core set and everyone should have them.  I’ll also be covering the objectives that come in the Corellian Conflict at a later date.


Advanced Gunnery is a dangerous objective to take, as it can benefit both you AND your opponent.  It also tends to be risky because it gives a benefit to your opponent as well, and if you are unlucky they may kill your objective ship and get a huge extra chunk of points. Also, with most heavy-hitting ships, you want to add gunnery teams, and this objective specifically won’t work with Gunnery Teams, because Gunnery Teams deny you the ability to attack more than once out of the same arc.

When should you include it:

One of the most common reasons to include this card is if you have a heavy firepower ship that does not, or can not, take Gunnery Teams.   This might be the case if you are running an Ackbar Build with an (H)MC-80.  MC-80s tend to be good targets for this, because they are tough enough to hopefully survive.  You can also consider running this on an Imperial Star Destroyer if your weapons team is occupied by something else, perhaps a boarding party.   Though most of the time if I’m running an ISD, I will often use Gunnery Teams instead of taking this objective.

If you are 1st Player :

Usually you don’t select this one.   However, if you’ve got a tanky ship that simply couldn’t take gunnery teams…. and you feel confident in being able to use this benefit better than your opponent, feel free.  It is important to note, that while the 1st player’s objective ship doesn’t get quite as good of a benefit as the 2nd player’s objective ship, you CAN still potentially attack the same ship twice if you are first player – You’ll just need to get that big firing arc into a position where it can attack two different hull zones of the same ship.


Opening Salvo is a favorite of mine.  It is one of those that gives something to both players, but really benefits fleets with a lot of ships.   It also offers the 2nd player the rare opportunity to throw black dice at long range – which can lead to some interesting combos.  One key point here is that you MUST discard your objective token the first time you attack a ship, so you actually may find yourself skipping your attack if it’s against a ship you don’t feel comfortable wasting your bonus, while shooting – (Perhaps a Gozanti with Tua and Electronic CounterMeasures).  This one also gives half score to players who manage to damage but not destroy enemy ships at the end of the game.  Great for those Star Destroyers who manage to avoid death, yet still take some damage.

When you should include it:

You absolutely want to include this in high ship-count lists.   If you are running 5 or more ships that can shoot (Sorry GR-75 Medium Transports), then this is usually a good bet.   It’s also nice to include this one if you’ve got specialized crit cards in your build, like Assault Proton Torpedoes, as you’ll now have an easy way to trigger those at long range.  It also helps to have some dice mitigation since you’ll be adding lots of dice here, so cards like Home One, Darth Vader, Ordnance Experts, and Leading Shots may be helpful as well.

If you are 1st Player:

If you have less than 4 ships you’ll most likely want to skip this one.  If you DO take this one you’ll generally want to have a lot of shooting ships.   If you have more shooters than your opponent, then I’d say absolutely go for this one.   Keep in mind you’ll only get red dice added to your first attacks, but that can be fine, especially if you’ve got Turbolaser Reroute Circuits equipped, or if your commander allows you to make the most out of those extra dice, like Darth Vader loves to do.  Also, since your are first player, at the start of each round you may want to prioritize attacking an opponent’s ships that still have an objective token, denying them both an activation and a powerful shot.


Most Wanted has literally made the difference in games that I would have lost otherwise.  The key with this card is that it lets the second player make both choices.  It does two things – It allows the 2nd player to pick one of the 1st players biggest ships that will end up being worth double points, (while picking one of their own least-important ships), and also gives extra dice to attacking ships that go after said objective ships.   Also this card has been errata’d in the official FAQ – under the SPECIAL RULE, it only allows SHIPS to add 1 die of any color, not any attacker.

When you should include it:

To make this card really shine you’ll need 2 things.  First, you’ll need some decent ship to ship firepower.   Several shooters would be good, since each ship that attacks the enemy objective ship will gain the bonus die.  Also, you’ll need a cheap ship, preferably a flotilla, to make your own objective ship.  This will minimize the impact if you lose it, and if you opponent gets bonus dice when going after a ship that isn’t exactly crucial to your build, then so be it.

When you are 1st Player:

This is one that a 1st player seldom wants to pick.   The only times you will want to chose this one are when your opponent won’t really get much out of it – weather they forgot to include a flotilla, or all of your ships are cheap and relatively worthless, (Hammerhead/CR-90 Swarm perhaps?).  Now if you happen to have a Hammerhead Swarm and your opponent has 3 Imperial Star Destrors plus a few TIEs, you actually might want to pick it!  You have to estimate that your opponent will pick his or her least valuable ship and your most valuable ship, and that both may get destroyed and ship value doubled.   If after doing the math, you still come out on top, then you might pick this one.


Obviously Precision Strike is meant to emphasize bomber-based fleets.   But at a second glance, you don’t need bombers to make it work.   (It just helps).  It’s going to give the 2nd player a concentrate fire token to each ship, which means if you are running a token-based commander like Tarkin of Garm, you’ll see very little benefit from this first part…. but the key is in the victory points that can be racked up.  This one has also become significantly more impactful since the core set wave, since we’ve seen new things that can really aide the bombers, such as Bomber Command Center, and Intel – really making it easier to rack up the points.  However, this card also offers very little as a bonus for the second player – and if you take it you run the risk of facing another bomber-based fleet

When you should include it:

If you have a significant investment in bombers, you may want to consider taking this one.   You’ll also need some anti-bomber mechanics as well, in case you face a ton of Y-Wings or TIE Bombers – because you absolutely don’t want the 1st player getting more points out of your own objective than YOU.  Your ships can also score points here, so agile, maneuverable ships like CR-90s are capable and tend to fit into bomber lists with ease.

When you are 1st Player:

If you have bombers.   Especially if you have more bombers than your opponent.   Any time you can turn your opponent’s objective against them, it’s going to be one heck of a ride!   Also if you have an effective way to deal with your opponent’s bombers, this might easily be the best objective to pick.  If you have few or no squadrons at all, then I’d strongly suggest passing on this one.


That wraps up the original red objectives!   Check back soon because we’ll be taking  a look at the rest of the core set’s Objectives, and then diving into the Corellian Conflict’s new ones after that!